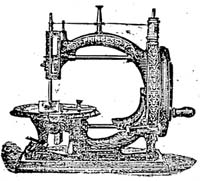
New Domestic Shuttle
MANAGEMENT OF THE CLOSED END SHUTTLE

A -- Opening the shuttle
B -- The thread in position for closing the spring over it
C -- The thread in place in the guide slots
D -- Closed, the thread drawn into the slots, ready to sew
(Picture and Text Courtesy of Dorothy Brumleve)
To Open It -- Take it in your left hand, the point down and the spring from you. With the thumb-nail press against the end piece (A) until it lifts out of the shuttle, when the spring will swing aside. (B)
To Thread It -- Drop the bobbin in shuttle, so that it will unwind from the bottom up, holding the end of the thread in the right hand, Draw thread down into slot and lay it to the right across the shuttle (B), between the prong on the left side of spring and the end of the cylinder. Then close the spring over the thread by gently pressing it to the left and downward until the end piece slips into place (D). With a movement of the right hand draw thread toward point of shuttle over left hand prong, and on down until it passes under right hand prong (C). Then draw the thread from you, leaving three or four inches out.
To place the Shuttle in the Machine -- Remove the front slide, turn top wheel of machine from you until needle bar is at highest point. Hole the shuttle in the right hand with the spring up, point towards you (flat surface of the point toward the curved surface of the shuttle race). Place point of shuttle in carrier, allowing round point on end of shuttle carrier to rest in small indentation in round part of shuttle. It will then drop easily into the carrier.
Note -- Do not turn the machine, except slowly, when the shuttle is in and the slide open. The screw by which the spring is pivoted to shuttle should never be turned
